You know that feeling when you open a jar of store-bought jam and it’s basically just red-colored corn syrup? It’s depressing. Honestly, if you have access to fresh raspberries—or even the good frozen ones—you should be making your own. Using a sure jell recipe for raspberry jam is pretty much the gold standard for home cooks because it actually sets. There is nothing worse than spending twenty dollars on berries only to end up with raspberry soup that runs off your toast and ruins your shirt.
I’ve made enough batches to know that while the yellow box makes it look easy, there are a few ways to absolutely wreck it.
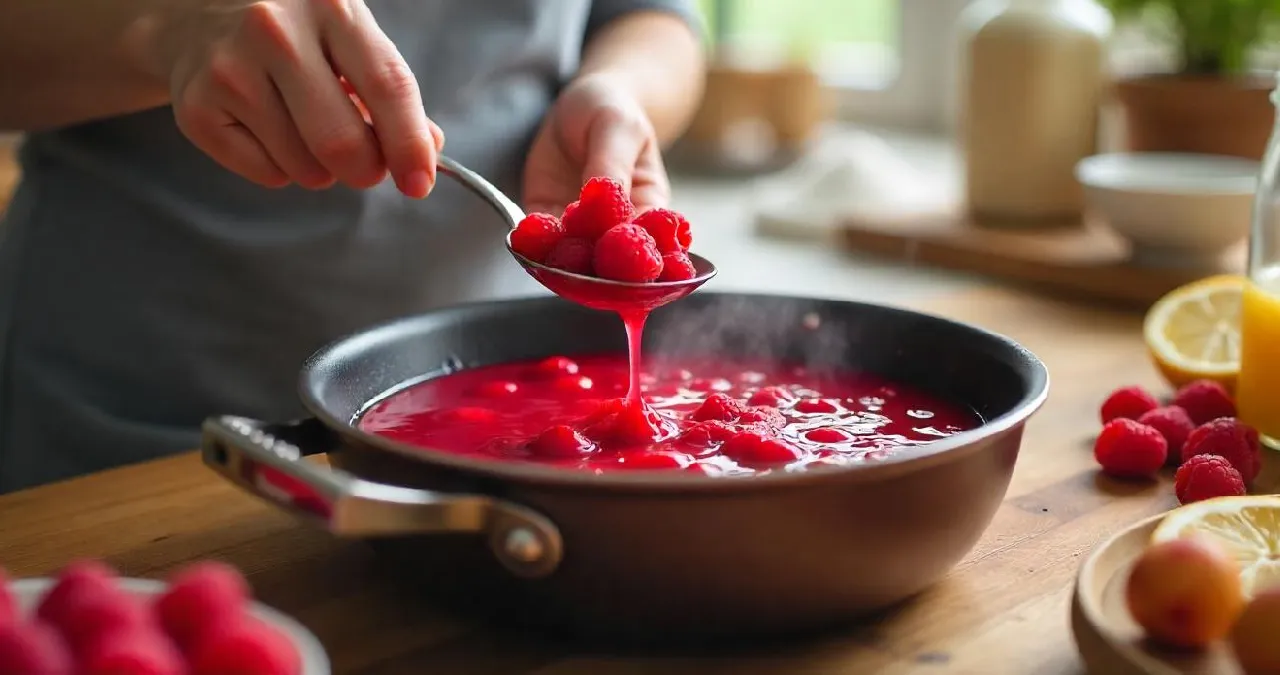
Raspberries are delicate. They aren't like apples or orange peels that are loaded with natural pectin. If you try to just boil them with sugar and hope for the best, you’re gambling. That’s where the Sure-Jell comes in. It’s a powdered pectin made from fruit peels, and it provides that structural integrity we all want. But you can't just wing the measurements.
Why the Sure Jell Recipe for Raspberry Jam Often Fails
People think they can be healthy and cut the sugar. Don't do that. Not with the original yellow box, anyway.
The chemistry of a sure jell recipe for raspberry jam relies on a very specific ratio of acid, sugar, and pectin. If you drop the sugar count, the pectin won't form the "mesh" needed to trap the liquid. You’ll get syrup. It might be delicious syrup, but it won't be jam. If you really want less sugar, you have to buy the pink box (the Less Sugar version), which uses a different chemical reaction involving calcium to set.
Then there's the heat issue. I've seen people get scared when the pot starts foaming and turn the heat down. Big mistake. You need a "full rolling boil." That means a boil that doesn't stop even when you stir it with a big wooden spoon. If it settles down when you stir, it's not ready. You need that intense heat to activate the pectin molecules.
The Exact Ingredients You Actually Need
Forget the fancy additions for a second. Stick to the basics until you’ve mastered the set. For a standard batch of the sure jell recipe for raspberry jam, you’re looking at:
- Exactly 5 cups of crushed raspberries. Don't just dump whole berries in a measuring cup; crush them first.
- Exactly 7 cups of granulated sugar. Yes, it's a lot. Just accept it.
- One box of Sure-Jell (1.75 oz).
- A tiny pat of butter (about 1/2 teaspoon). This sounds weird but it keeps the foam down so you don't have a pink volcano on your stove.
Step-by-Step Without the Fluff
First, prep your jars. Wash them in hot, soapy water. Some people use a dishwasher on the sanitize cycle. Whatever you do, make sure they are warm when the jam goes in. If you pour boiling jam into a cold glass jar, it can crack. Physics is mean like that.
Put your crushed berries into a large 6-quart or 8-quart pot. Stir in the box of Sure-Jell. Add the butter. Turn the heat to high. You need to stir this constantly. Don't walk away to check your phone. Once it hits that "can't be stirred down" boil, dump all the sugar in at once.
Now, keep stirring. Bring it back to a full rolling boil. Once it hits that peak boil again, set a timer for exactly one minute. One minute. Not 45 seconds, not two minutes. Overcooking pectin can actually break it back down, leaving you with—you guessed it—syrup.
The Foam Problem and How to Fix It
After that minute is up, remove the pot from the heat. You're going to see a layer of pale pink foam on top. It looks kinda gross and has a spongy texture. It’s perfectly safe to eat, but it makes the jam look cloudy in the jar. Use a metal spoon to skim it off.
Some old-school recipes suggest straining the seeds. Honestly? That's way too much work. Raspberry seeds are part of the experience. But if you hate them, you’ll need to run the crushed berries through a food mill before you start the cooking process. Just make sure you still end up with exactly 5 cups of liquid/pulp.
Getting a Perfect Seal Every Time
Water bath canning is the only way to make this shelf-stable. If you just put the lids on and leave them on the counter, they might "pop," but it's not a true vacuum seal. You need to submerge the filled jars in boiling water for 10 minutes.
Make sure there is at least an inch of water over the tops of the jars. When the timer goes off, pull them out and put them on a towel-lined counter. Leave them alone for 24 hours. Don't touch the lids. Don't press the centers. Just wait. You’ll hear those satisfying "tink" sounds as they cool and seal.
Common Misconceptions About Pectin
A lot of people think all pectin is the same. It really isn't. Sure-Jell is a brand of high-methoxyl pectin. It needs that high sugar concentration to work. If you try to swap it for liquid pectin (like Certo) mid-recipe, you're going to have a disaster. Liquid pectin is added at the end of the boiling process, while the powder in the sure jell recipe for raspberry jam goes in at the beginning. They are not interchangeable.
Also, check the expiration date on the box. Pectin is a natural product derived from citrus or apples, and it loses its "strength" over time. If that box has been sitting in your pantry since the Obama administration, throw it out and spend the two dollars on a new one.
The Freezer Jam Alternative
If the idea of boiling jars for 10 minutes sounds like a nightmare, you can use the same Sure-Jell box for freezer jam. The ratio is slightly different—usually less fruit and more sugar—and you don't cook the berries. You just mix the pectin with a bit of water, boil that, and then stir it into the fruit and sugar. It tastes more like "fresh" berries, but the texture is softer. It has to stay in the freezer or it'll spoil in a few weeks.
For the classic, thick, shelf-stable stuff, the cooked sure jell recipe for raspberry jam is superior. It has that deep, cooked-berry flavor that reminds you of something a grandmother in a farmhouse would make.
Troubleshooting Your Batch
If 24 hours have passed and your jam is still runny, don't panic. Sometimes it can take up to a week for pectin to fully set. If it’s still liquid after a week, you can actually "re-make" it. You’ll have to dump all the jars back into a pot, add a little more pectin and a splash of lemon juice, and re-boil it. It’s a pain, but it saves the fruit.
Usually, the culprit is one of three things:
- You measured the sugar by "eyeing it" instead of using a dry measuring cup.
- The berries were super overripe (ripe fruit has less natural pectin).
- The boil wasn't violent enough.
Final Actionable Steps for Success
To ensure your next batch of sure jell recipe for raspberry jam is a success, follow these specific technical cues:
- The Spoon Test: Before you jar the jam, put a small metal spoon in the freezer. Drop a bit of the hot jam on the cold spoon. If it wrinkles when you push it with your finger after a minute, it’s set.
- Altitude Adjustments: If you live in the mountains (above 3,000 feet), you need to increase your water bath processing time. Add 1 minute for every 1,000 feet of additional elevation.
- Headspace: Leave exactly 1/4 inch of space at the top of the jar. This is called headspace. Too much or too little can prevent a proper vacuum seal.
- Wipe the Rims: Use a clean, damp paper towel to wipe the rim of every jar before putting the lid on. One tiny speck of jam on the rim will cause the seal to fail.
Once the jars are processed and cooled, store them in a cool, dark place. They’ll stay good for about a year. Once you open a jar, put it in the fridge and eat it within a month. Honestly, though, it usually doesn't last that long once people find out it's homemade.